AI Agent Setup
This works through a Model Context Protocol (MCP) server — a structured endpoint that our docs site exposes for AI tools to search and reference. Once connected, your AI tool can answer questions like “How do I register a custom component with @makeswift/runtime?” by pulling directly from the docs.
We recommend makeswift-docs as the server name across tools for consistency.
Quick install for Cursor and Claude Code
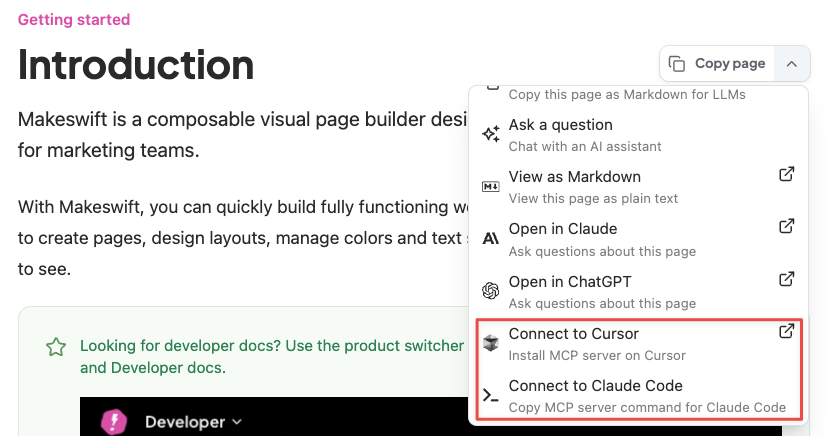
Click the Copy page dropdown in the upper right of any docs page and select Connect to Cursor or Connect to Claude Code to install the MCP server with one click — no manual setup needed.
For other agents — or if you prefer manual setup — pick your agent below.
Pick your agent

Terminal — Anthropic’s coding agent.

Terminal — OpenAI’s coding agent.

IDE — AI-first VS Code fork.
Desktop — general Q&A about Makeswift.
Setup your agent
Claude Code
Run this in any project to add the docs server for that project:
To enable it for all projects, add --scope user:
Codex
Run this in your terminal to add the docs server:
Confirm it appears with codex mcp list, then use /mcp inside the Codex TUI to check its status.
Cursor
In recent Cursor versions, the Settings → Tools & MCPs → New MCP Server button opens mcp.json for direct editing rather than a Name/URL form. Add the Makeswift docs server entry to either:
.cursor/mcp.jsonin your project root (project-scoped), or~/.cursor/mcp.jsonin your home directory (available in every project)
Save the file — Cursor picks the new server up automatically.
Claude Desktop
npx to work.Verify it’s working
Once you’ve connected, try asking your AI tool:
- “What MCP tools do you have available?” — you should see tools from the Makeswift docs server.
- “Search the Makeswift docs for controls.” — if it returns results pulled from the docs, you’re set.